It's often usefull to split an XCode project in several parts: the UI related code, and the code that's not related to the UI (tools, libraries, etc).
Such a split has many advantages. It allows different compilation settings for each part and a better compilation time, as each part is built separately, if needed.
This article will teach you how to setup such an XCode project.
First of all, let's create a new iPhone XCode project (the same applies for a Mac OS X application project).
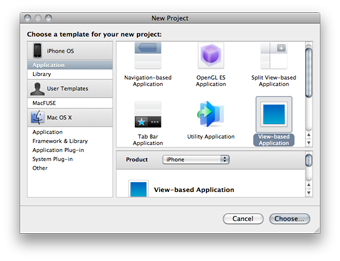
XCode creates by default the necessary files for a basic application.
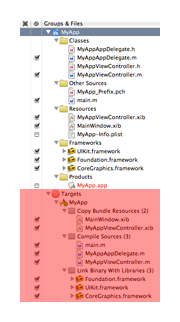
The «Targets» section consists of the different products that may be built by XCode.
In our case, we have an application. This target type includes the copy of the resources (XIB files - UI), the compilation of the application source code, and finally the link of the object code with the libraries and frameworks used by the application.
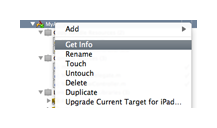
Each target can have specific build settings, that can be accessed through the contextual menu.
An XCode project can be composed of several targets. It is necessary if external libraries are used, but it may also be useful to split a project and optimize the compilation of the final application.
Let's start by creating a new class, named «MethodProvider», that we'll use, as it name implies, as a method provider for our application.
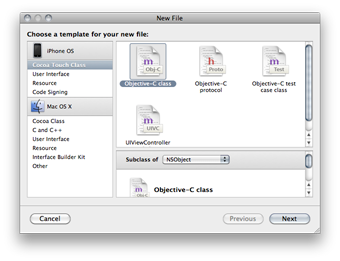
We are now going to implement a static method named «doSomething».
/* MethodProvider.h */
#import <UIKit/UIKit.h>

@interface MethodProvider: NSObject
{}

+ ( void )doSomething;

@end

/* MethodProvider.m */
#import "MethodProvider.h"

@implementation MethodProvider

+ ( void )doSomething
{
    NSLog( @"Method 'doSomething' called..." );
}

@end
We are going to call that method from our application, when it's loaded. We'll add the call on the «application: didFinishLaunchingWithOptions:» method of the «MyAppAppDelegate» class.
- ( BOOL )application: ( UIApplication * )application didFinishLaunchingWithOptions: ( NSDictionary * )launchOptions
{
    [ _window addSubview: _viewController.view ];
    [ _window makeKeyAndVisible ];

    [ MethodProvider doSomething ];

    return YES;
}
Do not forget to include the header file for the method provider class in the «MyAppAppController.m» file:
#import "MyAppAppDelegate.h"
#import "MyAppViewController.h"
#import "MethodProvider.h"
Now, the «MethodProvider» class is compiled at the same time as other project files. We are now going to change that.
Let's start by removing the class from our application's target. Simply uncheck the box at the side of the source file name.
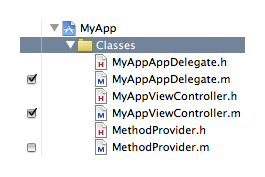
From now on, the class won't be compiled with other source files. The application build process will now fail, with the following message:
_OBJC_CLASS_$_MethodProvider", referenced from:
objc-class-ref-to-MethodProvider in MyAppAppDelegate.o
ld: symbol(s) not found
collect2: ld returned 1 exit status
It tells that the linker has not found the symbol corresponding to our class, even if it's used from the «MyAppAppDelegate» class.
So we are going to create a new target, whose goal will be to compile the «MethodProvider» class.
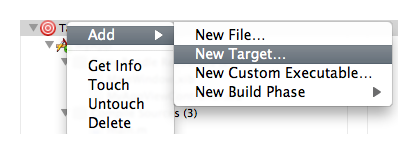
The type of the target will be «static library»:
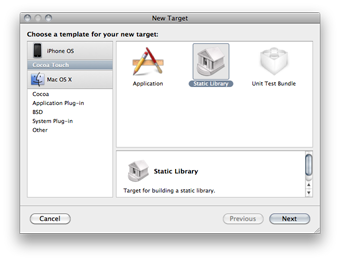
A library is a specific object code format, which can provide applications with functions. A library can be static or dynamic.
With a static library, the library's object code is integrated in the final binary, during link time.
There's only one binary, containing the library and the application codes. This way, the binary is larger, but the library does not need to be present on the host machine.
With a dynamic library, only it's path is included in the application's binary. The kernel will load the library code in memory when the application is launched.
The final binary is smaller, but the library needs to be available on the host computer. The application's launch time may also be a bit slower.
The main advantage of a dynamic library is that different applications can refer to the same library.
In our application, we're gonna choose a static library. On iOS, it's actually impossible to generate dynamic libraries.
When several targets are available, we can switch from one to another from a drop-down menu, in the tool bar:
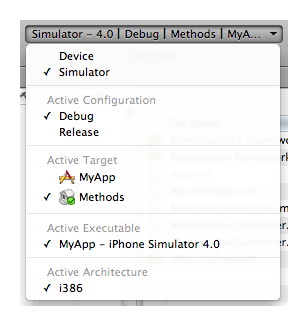
We can now switch to our «Methods» target, and add the file(s) that need to be compiled:
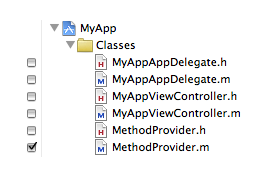
We can also see the library in the «Products» section:

Now we have to link our main application with the library. This is done through the «Link Binary With Libraries» phase of the application's target.
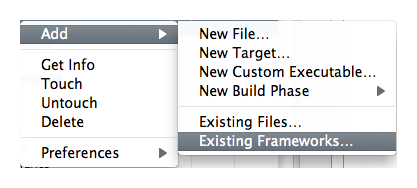
Let's add the library.
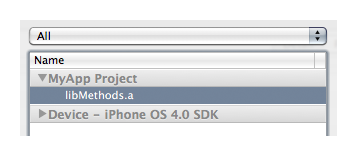
The last step is to tell XCode that our application depends on the library, so it's compiled before the application, if necessary.
This can be done by adding a dependancy, in the «General» section of the application's target:
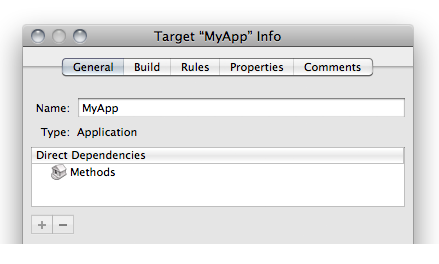
Now we can build our application without any problem.
This way of doing things can be used to split different parts of our code.
It's also used when we need to use external sources and libraries, like OpenCV (C++), JSON-Framework (Objective-C), etc.
We could choose to include the external source files in the same target as the application, but then it would be impossible to specify different compilation settings, and it will slow down the application's compilation time.
When using Objective-C categories, the use of a static library may cause problems (a category is a way of adding methods to an existing class).
We are going to add a category on the «UIApplication» class, in our library's target:
/* MyUIApp.h */
#import <UIKit/UIKit.h>

@interface UIApplication( MyUIApp )

- ( void )sayHello;

@end

/* MyUIApp.m */
#import "MyUIApp.h"

@implementation UIApplication( MyUIApp )

- ( void )sayHello
{
    NSLog( @"Hello" );
}

@end
Let's use the method in our application:
/* MyAppAppDelegate.m */
- ( BOOL )application: ( UIApplication * )application didFinishLaunchingWithOptions: ( NSDictionary * )launchOptions
{
    [ window addSubview: viewController.view ];
    [ window makeKeyAndVisible ];

    [ MethodProvider doSomething ];
    [ application sayHello ];

    return YES;
}
Do not forget to include the header file:
#import "MyUIApp.h"
Compilation will be successfull, but the application will crash, with the following message, displayed in the console:
- [ UIApplication sayHello ]: unrecognized selector sent to instance 0x5911700
This particular case is caused by the dynamic aspect of the Objective-C language (symbol resolution occures at run-time), and by the linker that does not generate symbols for categories.
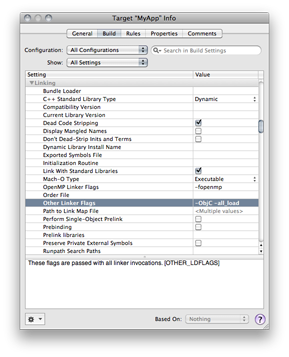
To solve the problem, we have to fix the linker parameters, in the informations of the application's target, and add, in the «Other Linker Flags» section:
-ObjC -all_load
